
Faucet Repair – How to Fix a Leaking Faucet
Before beginning a Faucet Repair project, you should first understand how a water faucet works. The first step is to remove the faucet’s stem and seat. If the seat has become damaged, it is important to sand it and replace it. Then, you can remove the handle, escutcheon cap, disk cylinder, and neoprene seals. Use distilled white vinegar or a soft scouring pad to clean the cylinder openings.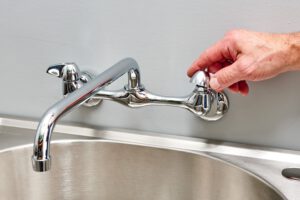
A faucet that is leaking might be caused by several factors, but luckily, a leak is a fairly easy repair. This option is less expensive than many other solutions and can save you a considerable amount of money on your water bill. Leaky faucets are a common plumbing problem, but a plumber can identify the root cause and make an accurate diagnosis. Don’t try to make a DIY repair unless you’re sure you’re doing it right, as you could end up doing more harm than good.
Remove the faucet handle with a Phillips head or Allen key. If there is a decorative cap covering the screw, use a flat-head screwdriver or utility knife to remove it. Once the handle has been removed, you should carefully remove the screw. Next, unscrew the valve stem assembly by screwing it counterclockwise with pliers. Alternatively, you can simply use a spanner wrench to remove the stem washer from the faucet handle.
If the leak is caused by the handle, the faulty rubber washer is the most likely culprit. However, it could also be caused by a cracked disc inside the cartridge. Replacing the disc cartridge is a more expensive option, and it is not always easy to detect. A simple repair can often solve a leaky faucet without a professional plumber’s help. It is important to remember to shut off the water supply before performing a faucet repair.
A ceramic-disk faucet is another type that needs a replacement. You can either buy a separate seal or purchase a complete replacement kit. Make sure to check that the replacement parts will fit properly with your existing faucet before proceeding. You can also use a pocket knife to remove the small index cover from the faucet handle. A hex-key wrench is used to loosen the hex-head screw that secures the handle to the faucet.
Once you have identified the cause of the leak, you can replace the damaged parts. Replaced O-rings, washers, and seals can repair a leaky faucet. If this doesn’t work, contact a professional plumber. Get free estimates from several plumbers to find the best fit for your faucet. This will save you money and ensure a functional faucet. Just be sure to follow these steps carefully. Keep in mind that you need to keep a toolbox handy, and do not forget the safety measures.
Before tackling a Faucet Repair project, it is essential to know the brand of your faucet. The name is typically stamped on the faucet and can help you find replacement parts for your faucet. You can also use penetrating oil to loosen a screw that is holding the handle on the faucet. If you cannot locate the part you need, it is best to take it to a store that specializes in faucet repair.
When performing a Faucet Repair project, remember that plumbing parts can be damaged by aggressive wrenches. To prevent damage to these parts, make sure you use a toothless wrench. Once you’ve removed the stem, you should pull the handle off the faucet and expose the O-ring and seat washer. If you notice any rust or sediment on the threads, you should use penetrating oil to break it up.
Leaking faucets are annoying and can waste a lot of water. A simple repair can save you a great deal of money and can even extend the life of your fixture. A leaking faucet can also cause health issues for your family because of the water that is being wasted. A simple repair can prevent the need for a replacement. If the problem persists, however, you should replace it.